Diffusion models, LLMs, and machine learning
ControlNet
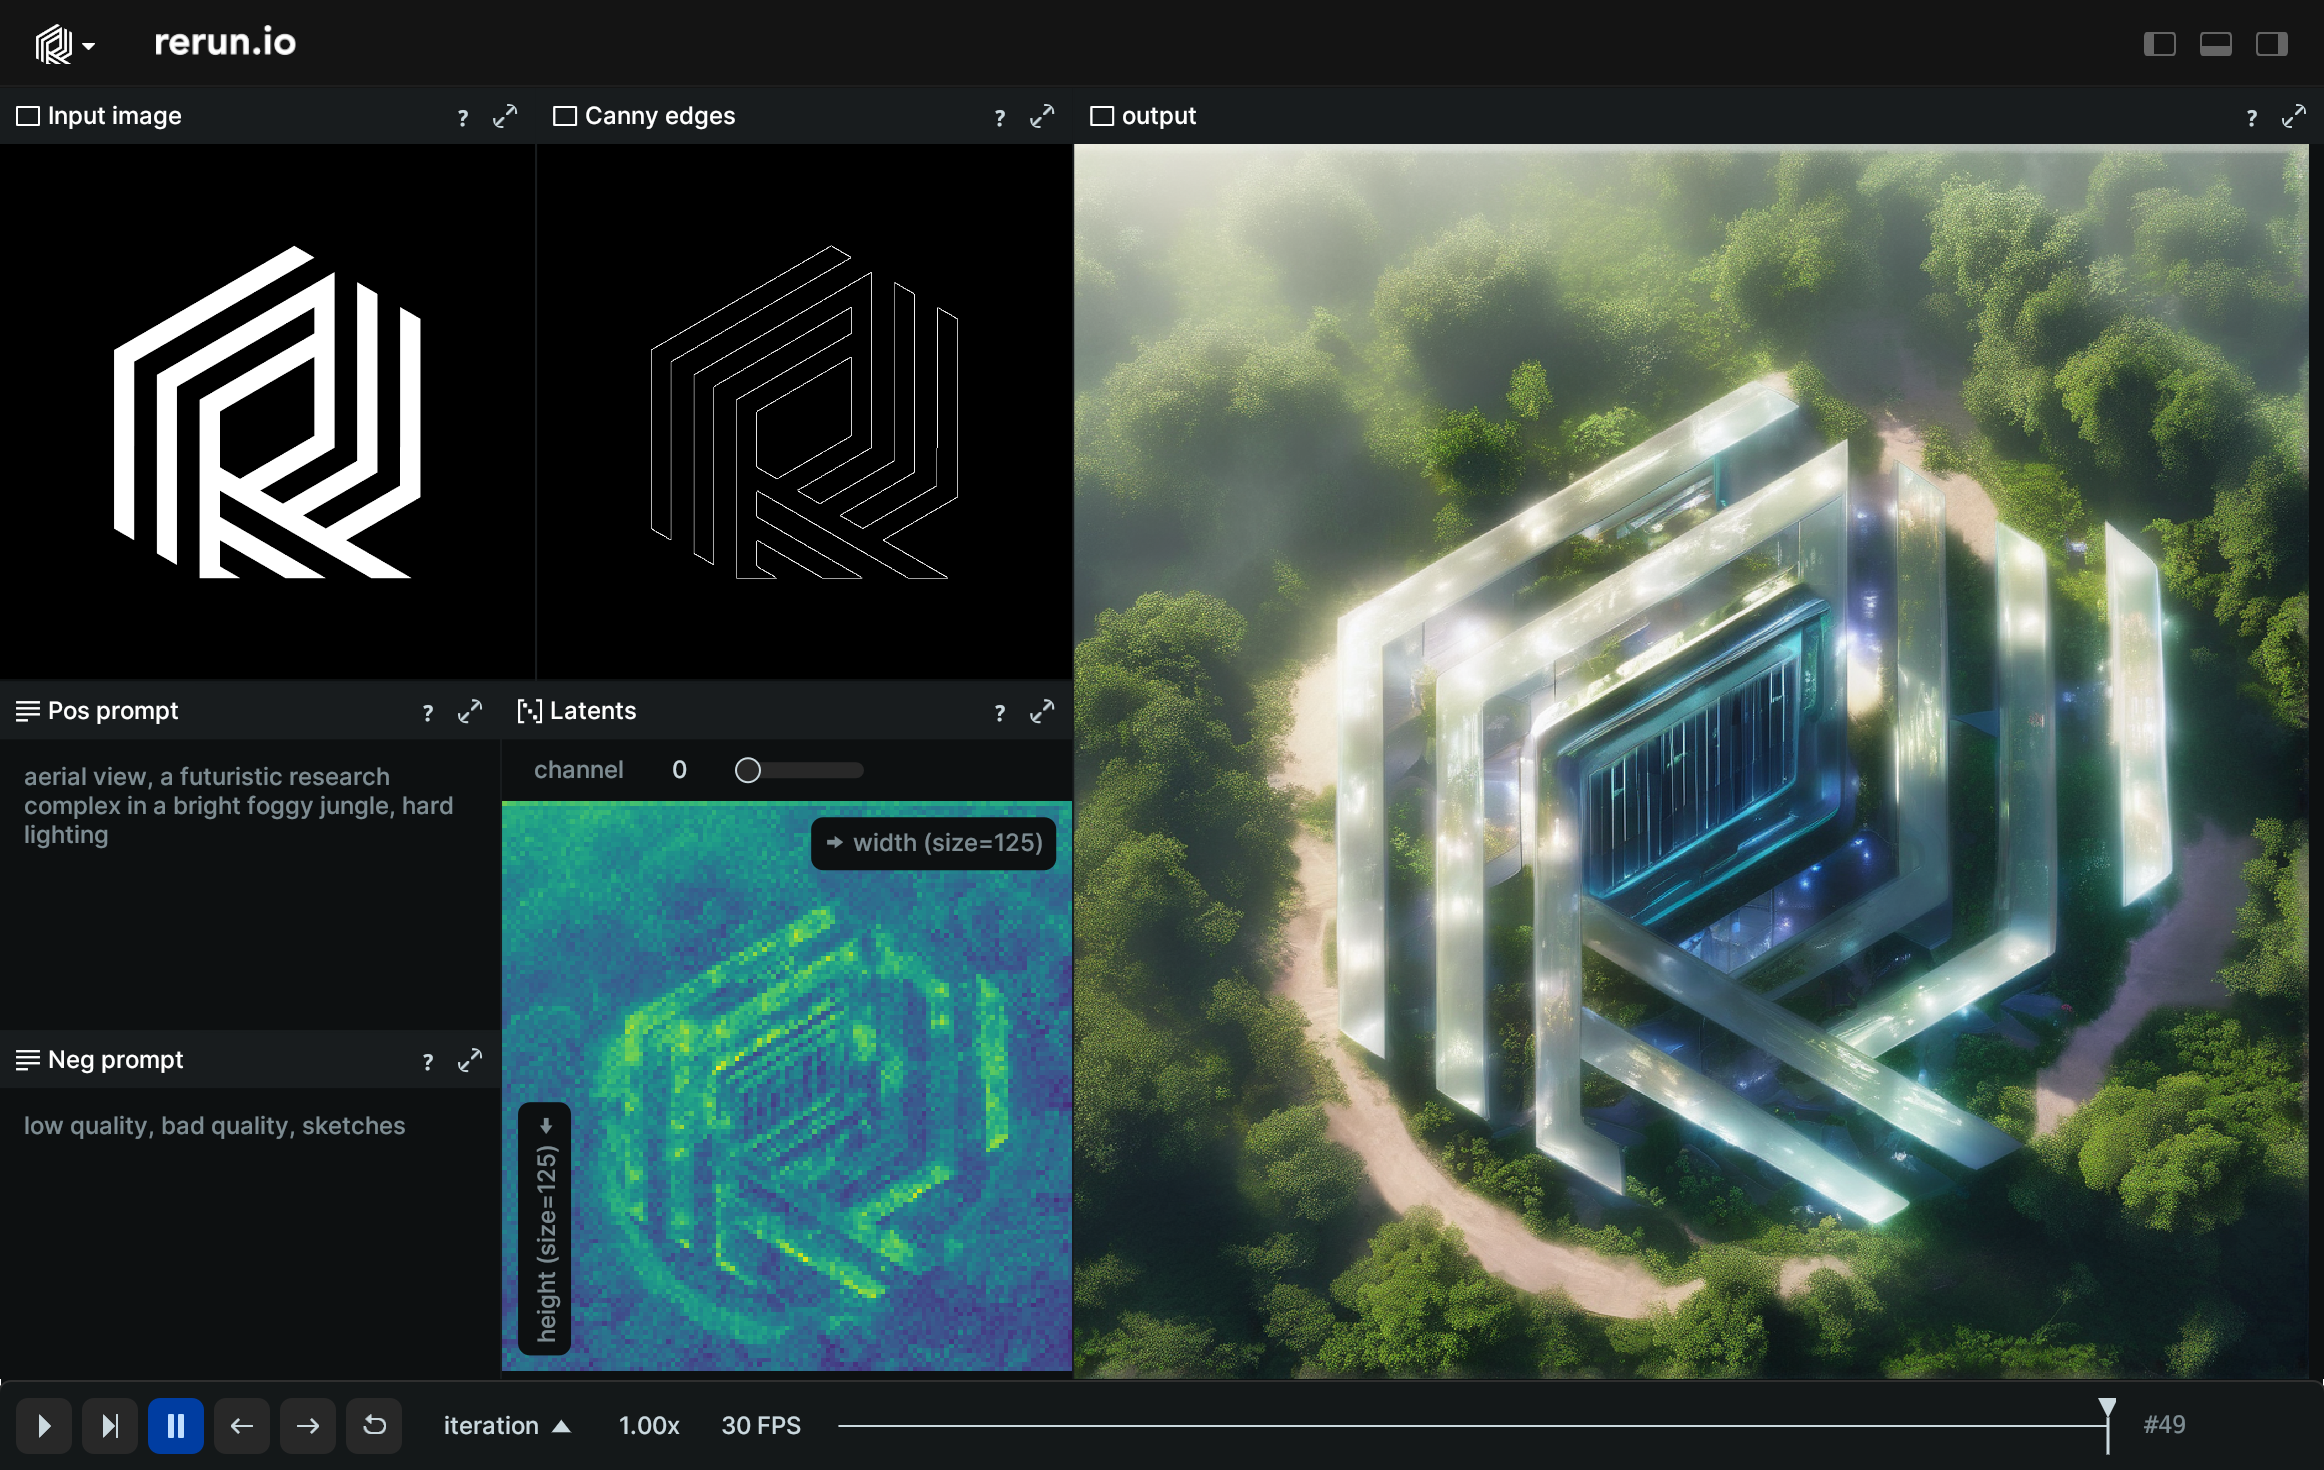
Use Hugging Face's ControlNet to generate an image from text, conditioned on detected edges from another image.
Used Rerun types
Background
Hugging Face's ControlNet allows to condition Stable Diffusion on various modalities. In this example we condition on edges detected by the Canny edge detector to keep our shape intact while generating an image with Stable Diffusion. This generates a new image based on the text prompt, but that still retains the structure of the control image. We visualize the whole generation process with Rerun.
Logging and visualizing with Rerun
The visualizations in this example were created with the following Rerun code.
Images
rr.log("input/raw", rr.Image(image), static=True)
rr.log("input/canny", rr.Image(canny_image), static=True)
The input image and control canny_image are marked as static and logged in rerun.
Static entities belong to all timelines (existing ones, and ones not yet created) and are shown leftmost in the time panel in the viewer. This is useful for entities that aren't part of normal data capture, but set the scene for how they are shown.
This designation ensures their constant availability across all timelines in Rerun, aiding in consistent comparison and documentation.
Prompts
rr.log("positive_prompt", rr.TextDocument(prompt), static=True)
rr.log("negative_prompt", rr.TextDocument(negative_prompt), static=True)
The positive and negative prompt used for generation is logged to Rerun.
Custom diffusion step callback
We use a custom callback function for ControlNet that logs the output and the latent values at each timestep, which makes it possible for us to view all timesteps of the generation in Rerun.
def controlnet_callback(
    iteration: int, timestep: float, latents: torch.Tensor, pipeline: StableDiffusionXLControlNetPipeline
) -> None:
    rr.set_time("iteration", sequence=iteration)
    rr.set_time("timestep", duration=timestep)
    rr.log("output", rr.Image(image))
    rr.log("latent", rr.Tensor(latents.squeeze(), dim_names=["channel", "height", "width"]))
Output image
rr.log("output", rr.Image(images))Finally we log the output image generated by ControlNet.
Run the code
To run this example, make sure you have the Rerun repository checked out and the latest SDK installed:
pip install --upgrade rerun-sdk  # install the latest Rerun SDK
git clone git@github.com:rerun-io/rerun.git  # Clone the repository
cd rerun
git checkout latest  # Check out the commit matching the latest SDK release
Install the necessary libraries specified in the requirements file:
pip install -e examples/python/controlnetTo experiment with the provided example, simply execute the main Python script:
python -m controlnetYou can specify your own image and prompts using
python -m controlnet [--img-path IMG_PATH] [--prompt PROMPT] [--negative-prompt NEGATIVE_PROMPT]This example requires a machine with CUDA backend available for pytorch (GPU) to work.